Step A: Google Setup
Starting from Sept. 2016 new server key can only be created in the Firebase Console using the Cloud Messaging tab of the Settings panel. Existing projects that need to create a new server key can be imported in the Firebase console without affecting their existing configuration.
Goal: Get your Google Server API key and project number.
Step A.1: Creating a Google app
- Go to the the Google Services Wizard.
- Select an existing Google app from the dropdown and type any name to create a new app.
- In the example below , we create an app named
test-application.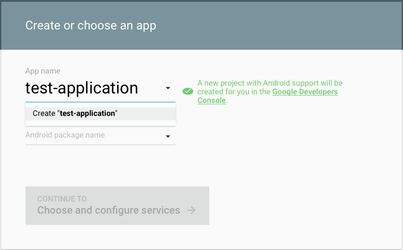
- Enter Android Package Name and click "Continue to choose & configure services"
- The project is created
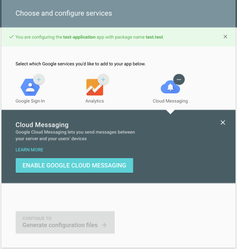
Step A.2: Enable Google Cloud Messaging
- Click Enable Google Cloud Messaging
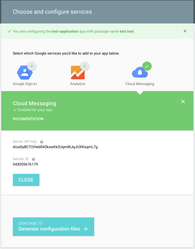
Step A.3: Get Server API Key and Sender ID
- Note the Server API Key & the Sender ID(Project Number)
- You will be required to provide the 'Project number' and 'API Key' as part of Step B: Appoxee Setup.
You have now successfully completed the Google setup.
Continue to Step B: Appoxee Setup.