Alternative - Adding the Appoxee Android SDK Using Eclipse
- Former user (Deleted)
As part of the Appoxee Android SDK integration process, you are required to extract the SDK to Eclipse.
Warning
When upgrading you must replace the entire "Appoxee resources" project and to make sure the the project dependency is linked to the new SDK.
Take the following steps:
After downloading the Appoxee Android SDK from the Android SDK Downloads page, extract the SDK to the designated Eclipse folder.
Using the Appoxee SDK for Android requires an Eclipse installation with Android SDK Tools Revision 20 or higher.
- Choose your Eclipse workspace.
- Create a new Eclipse folder from an existing project.
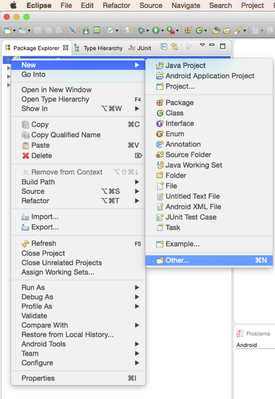
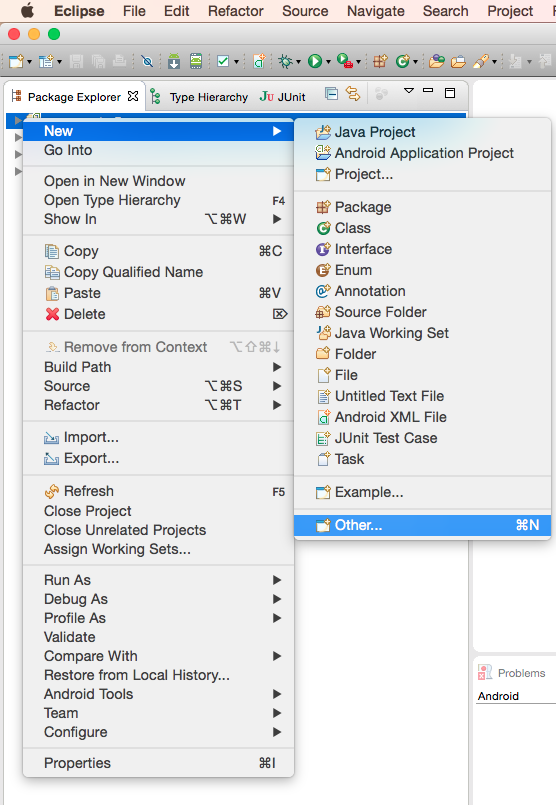
- From the menu, choose File > New > Other.
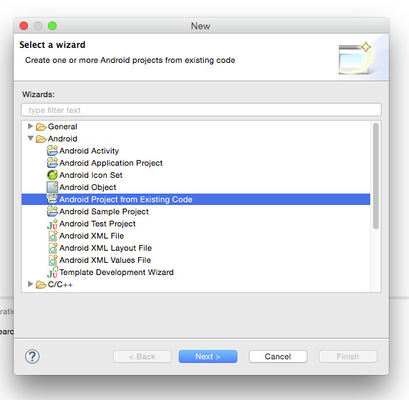
- In the new project wizard, select Android and then select the Android Project From Existing Code option.
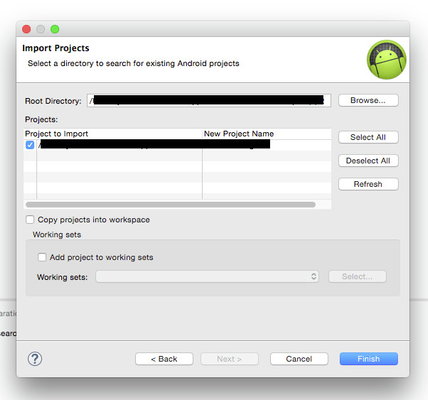
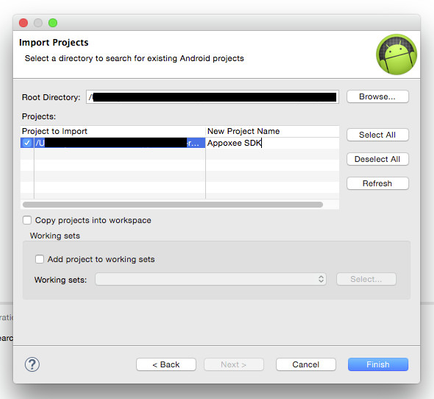
- Choose the Appoxee project , rename it for convenience and click Finish.
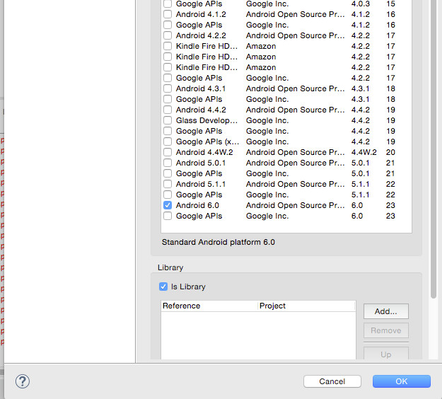
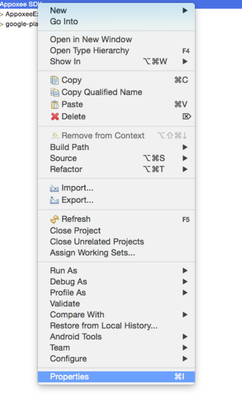
- To make the Appoxee SDK a library project compatible with Google Play Services, right-click on the project's Properties , change the API Level to the latest installed and checkbox isLibrary. Then click Finish.

Include the Appoxee project as a dependency of your Eclipse project:
In the Android menu, click the Add button and choose the Appoxee resources project.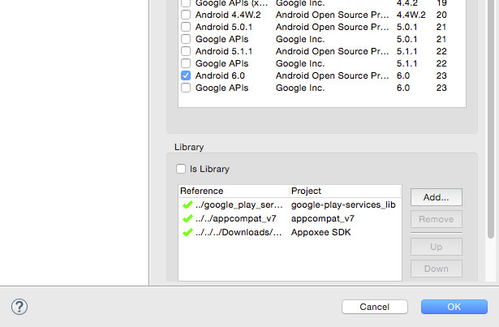
Make sure that the file appcompat_v7 is inside your eclipse work tree, otherwise import it.
Make sure that the file Google Play Services is inside your eclipse work tree, otherwise import it (Do not import it directly , but from a copy of the folder).
The Appoxee SDK are now included in your Eclipse project.