Goal: Get your Google Server API key and project number.
Step A.1: Creating a Google app
- Go to the the Google Services Wizard.
- Select an existing Google app from the dropdown and type any name to create a new app.
- In the example below , we create an app named
test-application.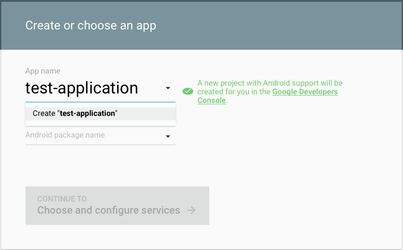
- Enter Android Package Name and click "Continue to choose & configure services"
- The project is created
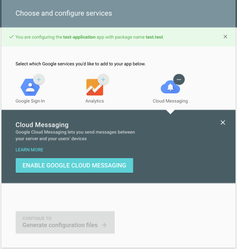
Step A.2: Enable Google Cloud Messaging
- Click Enable Google Cloud Messaging
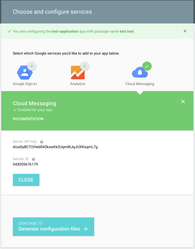
Step A.3: Get Server API Key and Sender ID
- Note the Server API Key & the Sender ID(Project Number)
- You will be required to provide the 'Project number' and 'API Key' as part of Step B: Appoxee Setup.
You have now successfully completed the Google setup.
Continue to Step B: Appoxee Setup.